SUMMER WORKSHOP · MISSION 01
BUILD A BOT.
TEACH IT TO SEE.
Your first challenge: begin the line-following G-Lab Bot by giving its Arduino Nano a voice—and putting your own message on screen.
THINK LIKE AN ENGINEERBUILD WITH YOUR TEAMMAKE IT YOURS
01 / THE CHALLENGE
Every great robot starts with one small success.
Before your G-Lab Bot can follow a line, you need to understand its brain and learn how to send it instructions.
Today, you will connect an OLED display, upload your first sketch, and remix the result. That glowing message is proof that your wiring, board settings, libraries, and code are all working together.
Your success signalA custom message appears on the OLED.
THE BRAIN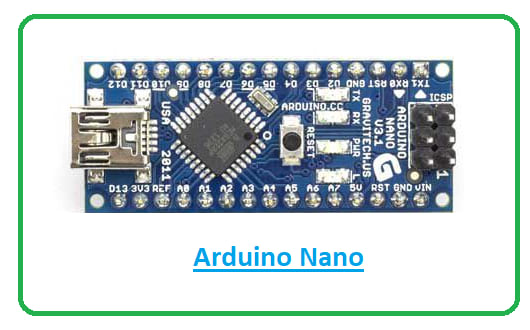
45 mm18 mm
02 / MEET THE NANO
Small board.
Big ideas.
The Arduino Nano is a compact microcontroller board—like a tiny programmable brain. It reads inputs, follows your code, and controls outputs such as displays, lights, sensors, and motors.
Classic Nano specifications verified with Arduino documentation and datasheet.
03 / GRAB YOUR GEAR
Four parts. One first win.
Arduino NanoThe brain
1×128×64 OLEDI2C / IIC display module
1×Mini breadboardNo solder needed
1×Dupont cablesMale-to-female
4×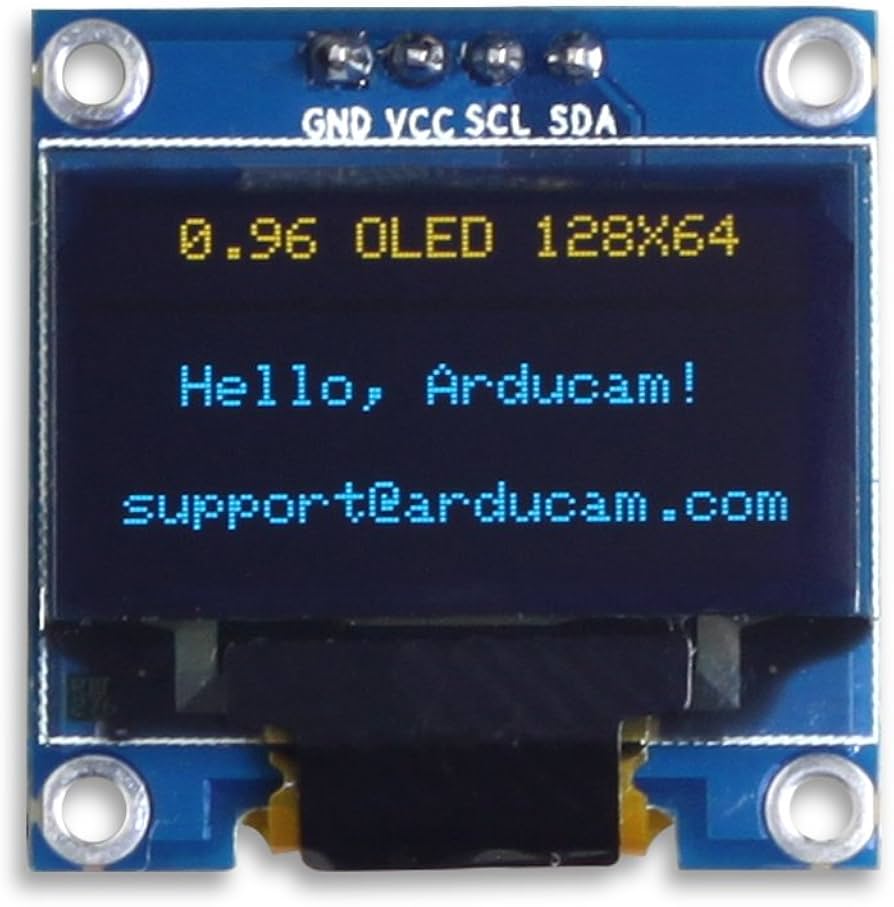
04 / MAKE THE CONNECTION
Four wires.
Match both ends.
Place the Nano across the center channel of the breadboard. Then connect each OLED pin to its Nano partner.
Power check: Disconnect USB while wiring. Confirm your OLED module accepts 3.3V before connecting power.
OLEDARDUINO NANO
VCC3.3V
GNDGND
SDAA4
SCLA5
05 / FROM WIRE TO WOW
Your 12-step build path.
Work in order. Check off each step as your team finishes it.
0%0 of 12 complete
06 / REMIX THE MESSAGE
Make the code sound like you.
Try your name, your team name, or a slogan. Then experiment with size, spacing, and scroll speed before changing the real sketch.
14/24 charactersLIVE PREVIEW
GND VCC SCL SDA
Preview only—change the matching values in your sketch, then upload again.
07 / CLAIM YOUR BUILD
Choose your G-Lab Bot color.
Mount the OLED and breadboard to the chassis that feels like yours. Every bot follows the same challenge—but every builder brings a different style.
YOUR CHASSISSunburst Yellow
OLED wired. Code uploaded. Message remixed.
MISSION 01 READY